When you purchase through links on our site, we may earn an affiliate commission. But the price of your product will not increase. Details
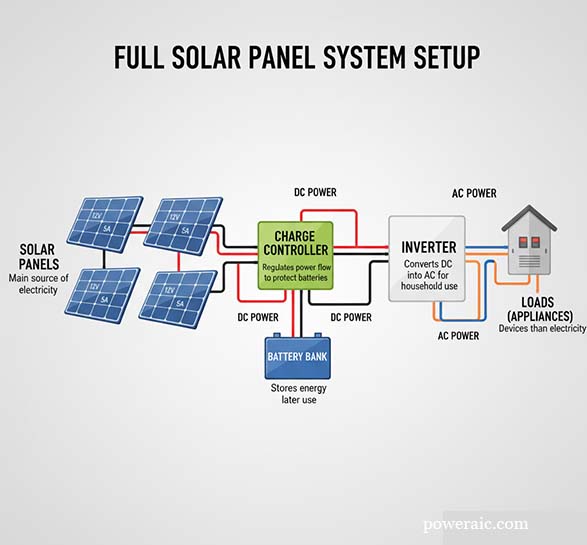
Solar energy is one of the most reliable and cost-effective renewable energy sources in today’s world. Whether you want to power your home, office, or RV, setting up a proper solar panel connection diagram is essential. Without a correct wiring plan, your system may not work efficiently or could even get damaged.
In this full guide, we’ll explain everything you need to know about solar panel wiring diagrams—step by step, with visuals you can use for better understanding.
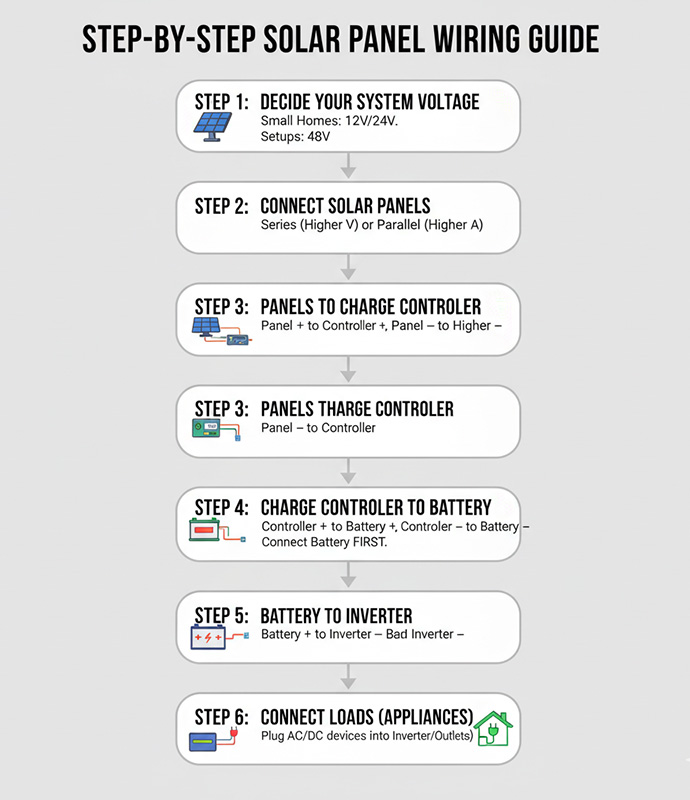
Follow the method that matches your inverter or battery requirements.
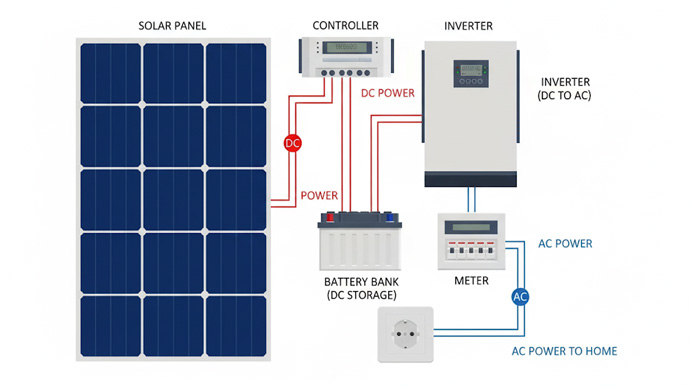
Step 3: Connect Panels to Charge Controller
Positive wire → Positive input of controller.
Negative wire → Negative input of controller.
Step 4: Connect Charge Controller to Battery
Ensure proper polarity (+ to +, – to –).
Always connect the battery before connecting panels to avoid damage.
Step 5: Connect Battery to Inverter
Inverter positive → Battery positive.
Inverter negative → Battery negative.
Step 6: Connect Loads (AC or DC Appliances)
Plug your devices into the inverter or directly into DC outlets.
Safety Tips for Solar Wiring
Always use proper MC4 connectors for solar panel wiring.
Use the correct wire size to avoid overheating.
Install a fuse or circuit breaker between components for safety.
Double-check polarity before turning the system on.
If unsure, consult a professional installer.
Conclusion
A solar panel connection diagram is the backbone of any solar energy system. Whether you’re setting up a small off-grid system for camping or a large residential system, understanding the wiring method is crucial. With the right setup, you’ll enjoy clean, renewable energy for years to come.
FAQ on Solar Panel Connection Diagram
1. What is the purpose of a solar panel connection diagram?
It shows how to connect panels, batteries, charge controller, and inverter safely and efficiently.
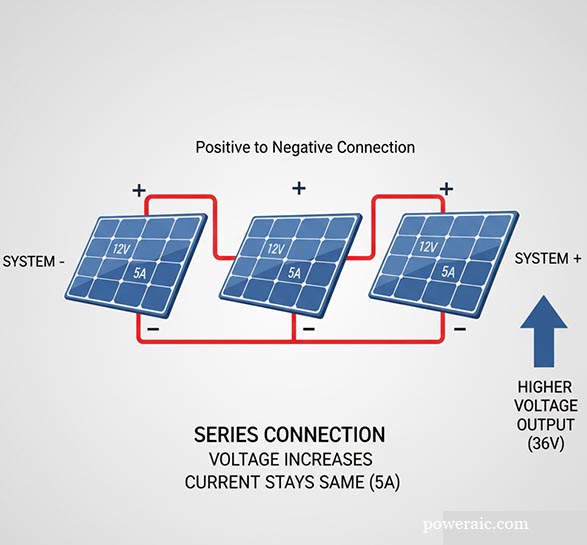
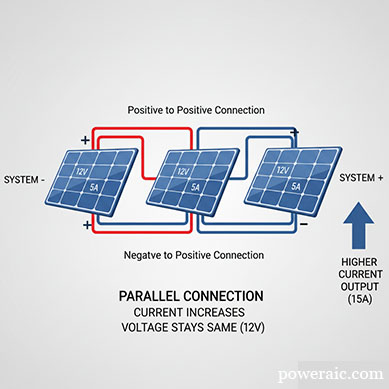
2. Which is better: series or parallel connection?
Series increases voltage, parallel increases current. The best option depends on your system needs.
3. Do I need a charge controller?
Yes, it protects the battery from overcharging and ensures stable power flow.
4. Can I connect solar panels directly to an inverter?
No, always connect through a charge controller and battery for safe operation.
5. Is solar wiring dangerous?
If done incorrectly, yes. Always follow diagrams, use correct wire size, and install fuses or breakers.